
TL;DR
Moving your high-power rig into a closet or separate room is the most effective way to reduce noise. Proper placement and ventilation turn a small, sealed space into a quiet, efficient workspace. Foam alone won’t cut it; sealing gaps and managing heat are key.
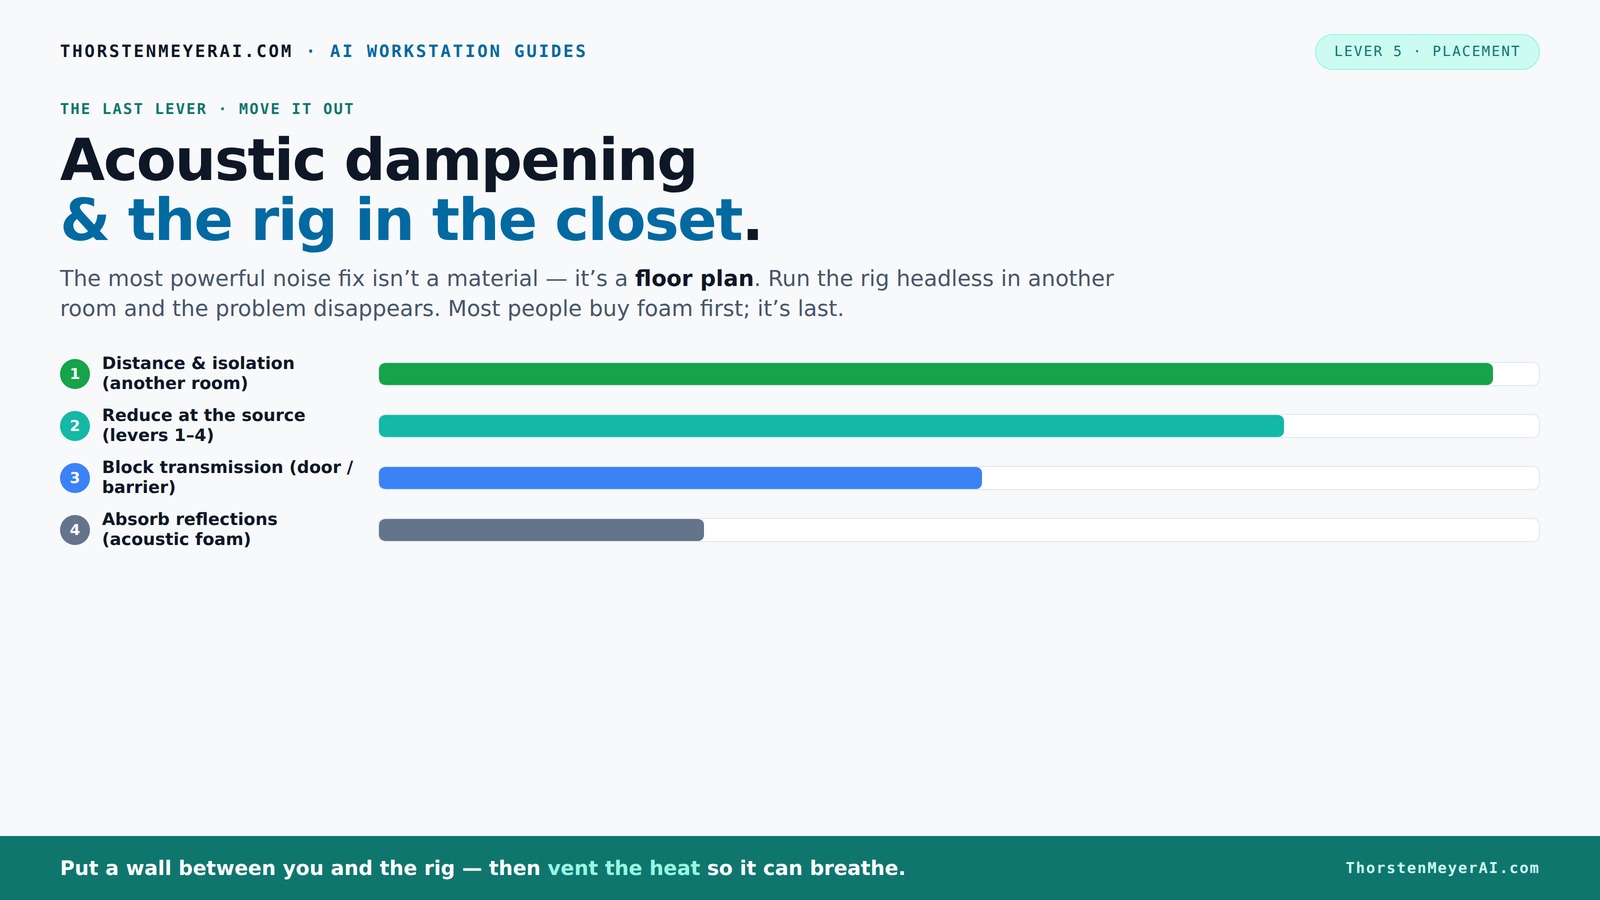
Acoustic dampening
& the rig in the closet.
The most powerful noise fix isn’t a material — it’s a floor plan. A rig you can’t hear because it’s in another room beats any amount of foam. Tap the approaches in Part 1 to see what actually works.
(another room)
(levers 1–4)
(door / barrier)
(acoustic foam)
Contain the noise, not the heat
Key Takeaways
- Moving your rig into another room or closet is the most effective way to cut noise, especially when paired with good ventilation.
- Sealing gaps around doors and cracks is more impactful than foam for soundproofing — focus on mass and airtightness first.
- Proper placement of panels at reflection points matters more than covering every inch of the wall.
- Vibration isolation pads and rubber feet significantly reduce structure-borne hum that foam can’t touch.
- Always balance soundproofing with heat dissipation — don’t trap hot air in a sealed closet.

JBER 12 Stück Akustikpaneele Selbstklebend, Schallschutzplatten 30 x 30 x 3 cm, Hochdichte Akustikschaumstoff Wandpaneele für Aufnahmestudio, Heimbüro, Schlafzimmer, Spielzimmer
【Professionelle Schallabsorption】Schallabsorbierende Schaumstoffplatten können Echos, Flatterechos und stehende Wellen effektiv absorbieren. Reduziert Mittel- und Hochfrequenzgeräusche und macht Audio...
As an affiliate, we earn on qualifying purchases.
As an affiliate, we earn on qualifying purchases.
Why Moving the Rig Outperforms Foam for Noise Control
When it comes to reducing noise, distance is your best friend. A rig tucked away in another room or closet is quieter than any foam panel can make your desk setup. Foam absorbs echoes inside a space but does little to stop sound from escaping or entering. Think of it like putting a soft pillow in a noisy room — it softens the echo, but doesn’t block the noise.
According to soundproofing experts, the biggest step is to increase the physical gap between you and the machine. A rig in another room with a solid door can be almost silent, even if it’s loud in the closet. For example, a GPU rig in a basement or spare closet can be almost imperceptible from your desk.

Audio System Door KIT 2.0 Dämm-Set: Schallisolierung für 2x Türen mit Neopren-Schaum, AluButyl und Silence Fleece Dämm-Vlies
As an affiliate, we earn on qualifying purchases.
As an affiliate, we earn on qualifying purchases.
How to Make a Closet Rig Quiet and Cool Without Overheating
Placing a powerful computer in a closet sounds simple — until you realize heat builds up fast. A sealed closet traps hot air, causing temperatures to soar. For more guidance on managing acoustic environments, see acoustic dampening tips. That’s the biggest risk: overheating and throttling, which makes fans spin louder in frustration.
To fix this, you need proper ventilation. A simple passive vent can help, but a quiet exhaust fan with temperature control keeps things cool. For high wattage setups, consider a purpose-built soundproof cabinet with ducted airflow and active cooling. This approach balances sound dampening with heat dissipation.
For more detailed guidance, check out [How to Reduce Heat and Noise in a High-Power AI Workstation](https://thorstenmeyerai.com/reduce-heat-noise-ai-workstation/).

Confezione Da 3 Ventole Pwm Da 120 Mm - Corsair - Rs120
Optimierte Lüfteranschlüsse: Verketten Sie mehrere Lüfter miteinander und steuern Sie sie alle über einen einzigen 4-poligen PWM-Anschluss
As an affiliate, we earn on qualifying purchases.
As an affiliate, we earn on qualifying purchases.
The Biggest Mistake: Sealing the Space Without Ventilation
It’s tempting to fully seal a closet to block sound. But sealing without airflow is a recipe for disaster. Trapped heat will cause your rig to throttle, fans to scream, and ultimately, hardware failure.
The key is to make sure hot air can escape. Use a combination of weatherstripping around the door and a ducted exhaust fan. You can also learn more about acoustic dampening and placement. Some people use soundproofed enclosures with active cooling, which blend noise reduction with airflow management. It’s about balancing soundproofing with ventilation.
For a DIY approach, consider lightweight, dense materials like drywall or mass-loaded vinyl for barriers, combined with a quiet fan and ducting.
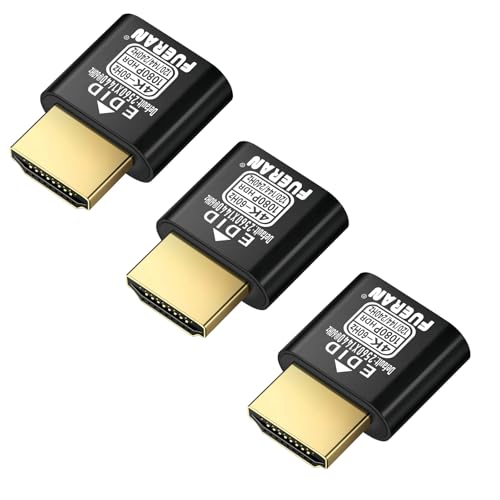
FUERAN HDMI Dummy Plug HDR 4K@60Hz 2K@120/144Hz 1080P@120/144/240Hz,edid Emulator Virtual Display Adapter,hdmi Headless Adapter(NEW-4K-HDR(default2560X1440) 3P)
✅ Function – Simulate a Display, Unlock GPU Performance--This display emulator plug creates a virtual screen by simulating...
As an affiliate, we earn on qualifying purchases.
As an affiliate, we earn on qualifying purchases.
Placement and Absorption: Where to Put Panels for the Best Results
Acoustic dampening in a closet isn’t about covering every inch — it’s about strategic placement. The first reflection points, typically around the mic and speaker height, matter most. Place panels where sound first hits the walls to prevent echo and boxiness.
For example, if you record vocals in a closet, mount panels at mouth height and near the ceiling to tame reflections. Soft materials like blankets or foam help reduce internal echoes, but don’t expect them to block noise from escaping.
Understanding why placement matters: internal reflections are the primary cause of echo and muddiness in recordings. Properly positioned panels absorb these reflections at critical points, significantly improving sound clarity. For detailed advice, visit acoustic treatment strategies. However, they won't prevent sound from leaking outside the space, which is why placement is more impactful than random coverage.
How Much Wall Coverage Do You Really Need?
| Coverage Level | Best For | Pros | Cons |
|---|---|---|---|
| Minimal (20-30%) | Reducing echo and reflections | Cheap, quick, effective inside the room | Does little to block sound leaks |
| Moderate (50%) | Better internal acoustics, some soundproofing | Balanced approach, less clutter | Limited outside noise control |
| Full coverage (>70%) | Max soundproofing and echo reduction | More control, professional sound | Expensive, harder to install |
For small spaces like closets, 30-50% coverage at reflection points and corners offers a good balance. Excessive coverage can be unnecessary and cost-prohibitive. The goal is to target the primary sources of internal echo and sound leakage, not to cover every surface. Prioritize sealing gaps and placing panels at reflection points for maximum effectiveness, understanding that more coverage yields diminishing returns and increased costs. Strategic placement and sealing are key tradeoffs in effective soundproofing and treatment.
Vibration and Mechanical Isolation: Stop the Hum at the Source
Noise isn’t just airborne — it travels through solid surfaces. The low-frequency hum from your GPU or fans can transmit into the desk or floor, radiating as sound. To cut this down, use rubber feet, anti-vibration pads, or decoupling mounts under your equipment.
For example, placing your server or PC on a thick rubber mat can significantly reduce the vibration and humming that travels into the floor and surroundings. This is especially important in small, enclosed spaces where vibrations can easily amplify and become audible. Mechanical isolation reduces the transfer of vibrations at the source, which can be just as critical as soundproofing the space itself. The tradeoff is that some vibration transmission is inevitable without proper isolation, and neglecting this aspect can leave persistent hums that vibration isolation cannot block. Prioritizing vibration isolation is crucial for achieving a truly quiet environment.
Mic and Speaker Placement in a Small Closet: The Key to Clarity
In a tiny space, where you place your mic and speakers makes all the difference. Position the mic away from reflective surfaces and at the first reflection point — typically just outside the mouth’s line of sight to the wall. For more on optimal placement, see mic and speaker placement tips. Use a mirror to find these points if needed.
For speakers, aim them directly at your ears, not pointing at walls or corners, which can cause boomy, muddy sound. Adding a small, soft panel behind your mic helps tame early reflections and makes your recordings clearer.
Proper placement reduces unwanted room sound and reflections that muddy recordings. The key is to position your mic and speakers to minimize the impact of the room’s acoustics. This means avoiding placing the mic directly facing reflective surfaces and ensuring speakers aren’t pointed at corners, which can cause bass buildup. Always listen critically and adjust until the sound feels natural and free of echo, because even small shifts can dramatically improve clarity.
Hybrid Approaches: Seal, Dampen, and Place Strategically
Don’t rely on just one trick. Combining sealing gaps, adding mass, and placing absorption panels gives the best results. Seal all cracks around the door with weatherstripping, then add dense barriers like drywall or vinyl. Finish with targeted absorption at reflection points.
This layered approach allows you to address multiple issues simultaneously. Sealing gaps prevents sound leaks, adding mass reduces transmission, and strategically placed panels absorb internal reflections. This holistic method recognizes that no single solution is sufficient alone; the tradeoff is complexity and cost, but the payoff is a space that’s both quiet and acoustically controlled. Such layering creates a more comprehensive environment that minimizes sound escape while improving internal sound quality.
Learn more about layered strategies in [this article](https://thorstenmeyerai.com/reduce-heat-noise-ai-workstation/).